Windows installation Part 2
Step 5 − Once the upgrade starts, the system will perform a series of tasks, during which you will see the following screen.
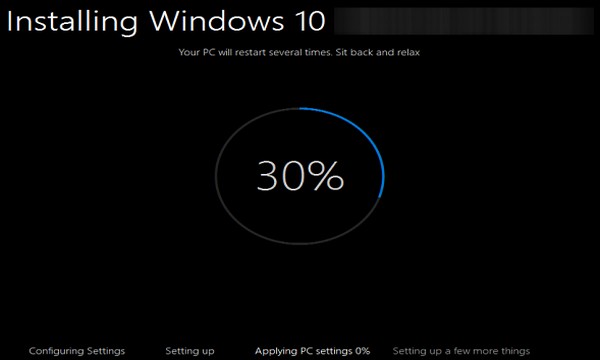
During this time, your computer will reboot a couple of times, so don’t worry. The process itself will take you through the steps to complete the upgrade.
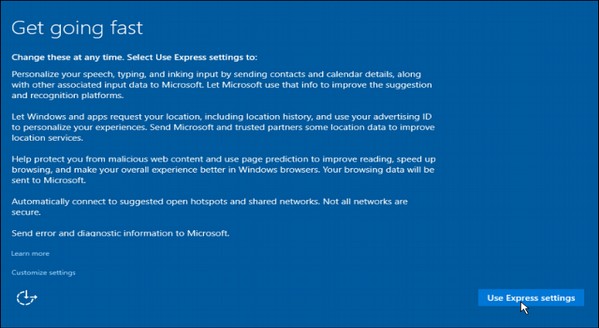
Step 6 − As the upgrade approaches its end, it will ask you to configure some basic Windows settings. You can choose to use Express settings, which will apply the most common or recommended settings, or you can choose to customize the settings as you please.
Step 7 − After the upgrade finishes, you’ll see the Windows welcome screen.
Clean Install
If your computer has an older operating system like Windows XP or Vista, you won’t be able to upgrade for free. In these cases, you’ll need to buy a boxed copy of Windows 10 to have a valid license for the installation. Windows 10 will have a starting price of $119.
But take in consideration that old computers that have either XP or Vista installed might have obsolete hardware components and might not be suitable for Windows 10. In this case, make sure you review the system requirements listed at the beginning of this chapter to check if your computer is qualified for a Windows 10 upgrade.
If you choose this type of an installation, just insert the disc in your computer and turn it on. Most computers will ask you to press a specific key to boot from the CD/DVD, but most systems use the F12 key. After accessing the disc, you just have to follow the steps which are very similar to the ones from the upgrade.


Comments
Post a Comment